Hanging Outdoor Christmas Lights Safely | Devon Self Storage
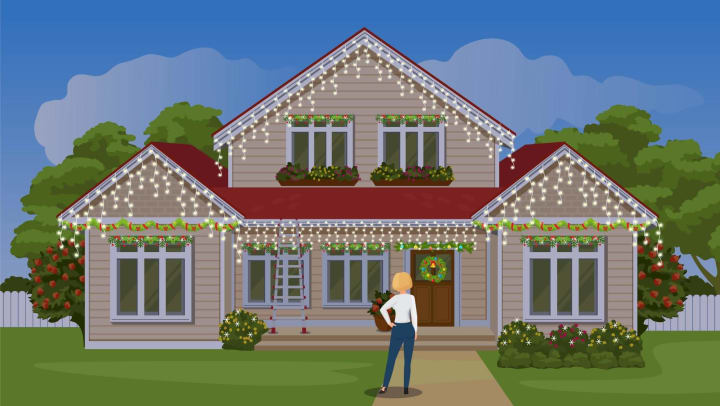
Few things mark the holiday season like hanging outdoor Christmas lights on your home. From sparkling icicle lights to jovial multicolored bulbs, there are countless ways to put your holiday cheer on display for your friends, family, or passersby in your neighborhood. But if you’re a yuletide decor procrastinator—or simply scared of heights—you might’ve put off getting lights up on your home until the last minute this year.
With Christmas only a few weeks away, there’s not much time left to showcase your unique spirit like Martha May Whovier. Thankfully, we’ve got a few tricks that will help you hang outdoor Christmas lights as quickly as Martha May’s light gun—all while ensuring you or your family stays safe during the process.
How to Hang Christmas Lights in 5 Steps
Step One: Measure
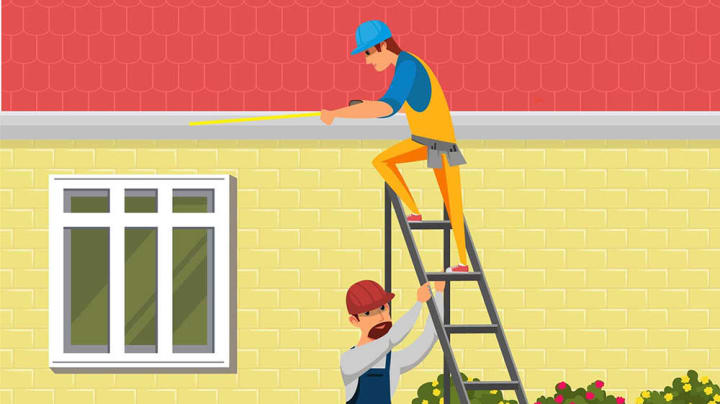
The first step to hanging outdoor Christmas lights involves measuring your roofline, gutter run, or any area in which you plan to install lights. Not only will this save you multiple trips to your local hardware store, but it will also help you factor in the distance to your power source.
To accurately measure the length of your roof, you will need the following tools:
- Ladder
- Tape measure
- Chalk or pencil
- Notebook or smartphone
- Toolbelt
- Spotter
With your tape measure and pencil in your tool belt, place your ladder near one end of your roofline. As you begin to climb, be sure your spotter is monitoring the process while keeping your ladder in position.
Once you can reach your roofline or gutter, run your tape measure as far as it can go, take that measurement in your phone or notebook, and place a visible mark with your chalk or pencil to denote where the tape measure stopped.
Continue this process around your roofline while writing down each measurement. Once completed, add up all your measurements to see how many feet of Christmas light strand you will need.
Note: If you have a flat gutter run or roofline and want to avoid measuring from a ladder, you can estimate the distance by measuring the base of your home from corner to corner. Though not accurate to the inch, this can give you a rough idea of how many strands you’ll need.
Step Two: Choose Your Lights
Christmas lights come in all shapes, sizes, and colors to match the style of your home, including various bulb types and icicle styles. When shopping for hanging Christmas lights, make sure they are:
- Rated for outdoor use
- Underwriters Laboratories (UL) certified
- Feature male and female end connectors
- Utilize LED bulbs
LED bulbs will draw less power and cut down on energy usage throughout the winter months, not to mention they can hold up to inclement weather and keep your family safe if a shortage occurs.
Select the Correct Light Clip
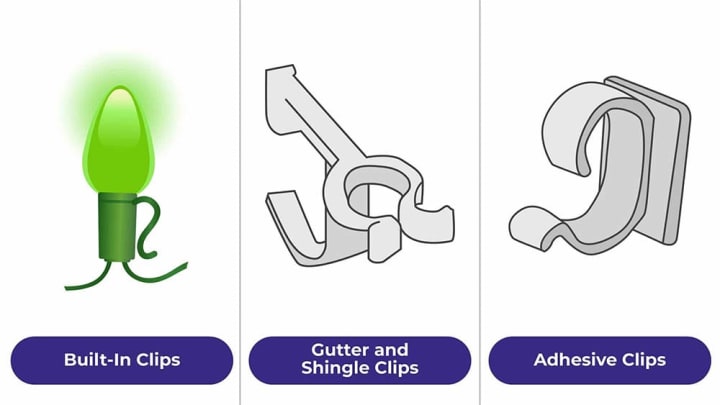
While some lights have built-in gutter hooks to simplify the hanging process, others require additional fasteners to match the structure of your roof. If you plan to hang your lights from your gutters or shingles, universal light hooks are your best bet. These dual-application hooks allow you to install your lights from either place on your roof, making them an invaluable asset.
If you plan to hang lights around window frames, doorways, railings, or underneath eaves, adhesive light clips are a great route to avoid damaging your home with nails or staples. Installing an adhesive light clip is as simple as peeling off the protective sheet, sticking the clip to your desired area, and hanging your light strand from it.
Step Three: Prep for Hanging
No matter what type of Christmas light you choose, securely fastening them to your roofline is easy with the right prep work and equipment.
Tools you will need to hang your lights include:
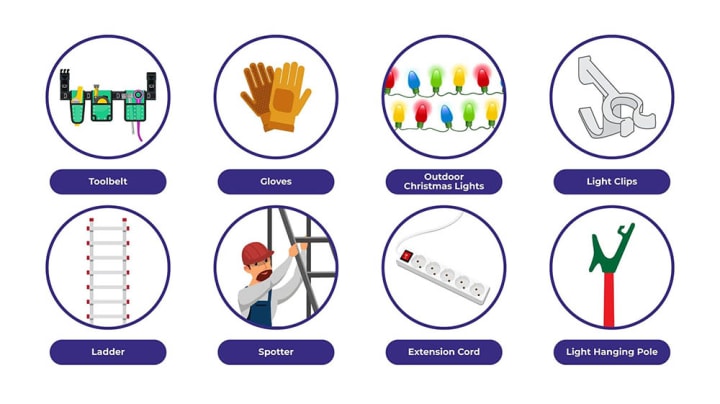
- Toolbelt
- Gloves
- Outdoor Christmas lights
- Light clips
- Ladder
- Spotter
- UL-approved extension cord
- Light hanging pole
For hard-to-reach areas on your roofline, you can also utilize a Christmas light hanging pole to secure your lights to your desired location.
Before you start to hang your lights, test them on the ground. Depending on how many light strands you have, connect them all together and plug them into your power source to ensure each bulb is working properly and there isn’t a shortage throughout your line.
Take the Proper Precautions
Hanging outdoor Christmas lights should be a fun and exciting experience––but one that requires a few precautions beforehand. Prior to becoming the next Clark Griswold, there are a few things you should watch out for to stay out of harm’s way, including:
- Avoid hanging lights in inclement weather, as this could cause unsafe, slippery working conditions.
- When hanging lights, avoid doing so from on top of your roof. Always use a ladder so you’re working at an upward angle rather than crouching or laying at a downward angle to reach your roofline.
- Ensure your outdoor power source utilizes a ground fault circuit interrupter (GFCI), allowing the unit to trip off when there’s a current leakage or a short circuit. Additionally, your outdoor outlets should feature a watertight cover that remains shut when your extension cord is plugged in.
- Hanging Christmas lights takes patience. Instead of rushing, take your time to ensure your safety is your number one priority. Before you know it, you’ll be able to flip the switch on your lights.
With these precautionary notes in mind, you’re ready to deck the halls!
Step Four: Get to Hanging
After you’ve connected all your light strands and confirmed they work, gently coil the lights around your shoulder in an up-and-over motion until the entire strand is neatly wrapped. Keep in mind, you don’t have to coil your extension cord along with it, as you will plug the lights in once you’ve finished.
With your toolbelt loaded with light clips and/or your Christmas light hanging pole, your hands-free and your spotter on-site, you can begin to climb the ladder to reach your roofline. Once you’ve made it to the top and you’re securely positioned in a rung, remove the lights from your arm and place the coil in front of you on the roof.
Starting on one end of your gutters, shingles, or eaves, begin to position your light clips and hook your strand onto each one as you go. This process can feel tedious, as you’ll have to move your ladder and your light coil every few feet, but this ensures you are in the safest possible position during the process. For hard-to-reach eaves or high points, make sure to utilize your light hanging extension pole rather than reaching out with your arms.
Step Five: Connect to Your Power Source
Now that all your light clips are installed along with your light strand, you can finally connect to your power source. Plug the end of your light strand into your extension cord or GFCI outlet and watch the magic unfold before your eyes!
Store Your Christmas Decor at Devon
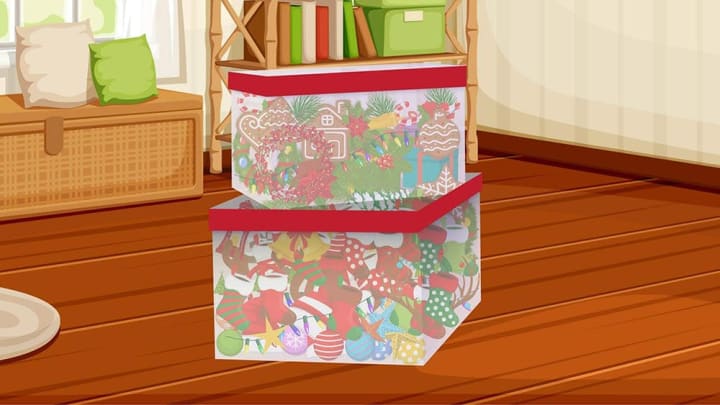
When the holiday season comes to a close and the new year begins, you’re likely going to have storage containers full of seasonal decor. From artificial Christmas trees and ornaments to your hanging outdoor Christmas lights, your belongings can take up valuable space in your closets, stairwells, or garage. Instead of cramming your home full of things that you won’t use until the end of the year, you can get the extra space you need at a Devon Self Storage facility near you.
With a wide range of unit sizes, month-to-month rental options, and climate-controlled storage, our self storage units will ensure your belongings stay protected throughout the year until you’re ready to decorate again. Call Devon today to reserve your storage unit!